
Physical Inventory Process
Modified on: Fri, Sep 25, 2026 at 5:24 PM
It is an Auditor requirement that State Fleet Management inventory all the vehicles in the fleet once a year. The Auditors require that each vehicle be physically checked and accounted for. Physical Inventory is typically performed toward the beginning of each Fiscal Year. As of FY 2025, a review of the Geotab Physical Inventory Dwell Report is required for vehicles with a telematics device installed.
Please verify the following information:
- VIN, Plate, and Asset match the Excel sheet
- Physical address
- Run and review the Geotab Physical Inventory Dwell Report for vehicles with a telematics device installed
- Verify the Physical Address matches the Dwell Report
- Provide an Explanation if they do not match
- Verify that the vehicle has a current registration card and proof of insurance is in the vehicle
- Type the name of the person inspecting each vehicle
- Vehicle Coordinator signature (typing the signature is fine) in Excel at the bottom and return in Excel format to dpa_mvac@state.co.us. Please include the Fleet Manager's Address
Due to MyGeotab report limitations, if your fleet has more than 100 vehicles, please be sure to run a separate report for each unit. You can watch the Applying Group Filter video below if you need assistance selecting each unit individually.
- Navigate to Reports > My Reports and search for "Physical Inventory" to locate the report in MyGeotab (or use the following link: Physical Inventory report)
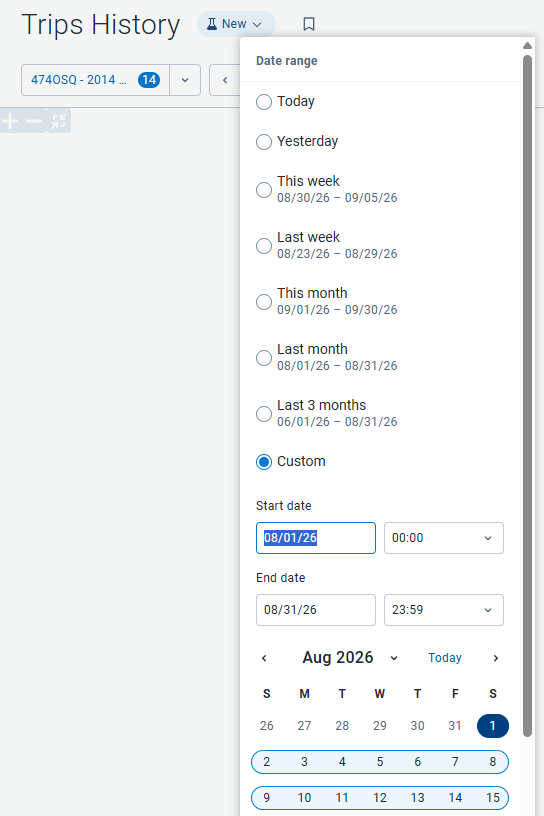
- Open the report and wait a few moments for it to load, then adjust the period of the report to include one month:
- Selecting "this month" will only run for days in the current month
- Selecting "last month" will not include any days from the current month
- Be sure to click "Apply" after making adjustments
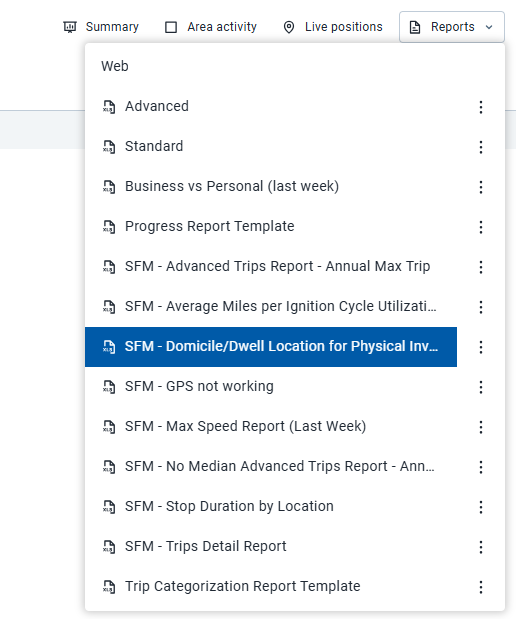
- The report will begin processing again - no need to wait! Immediately initiate an export by selecting “Reports > SFM - Domicile/Dwell Location for Physical Inventory”
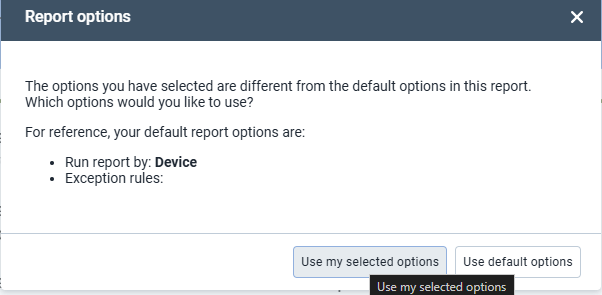
- A context pop-up will ask about your custom options, choose “Use my selected options"
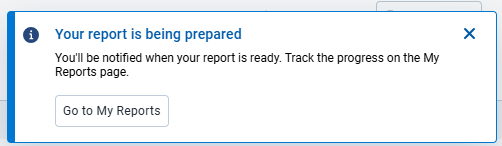
- The report will queue to “My Reports” and run in the background. A push notification will inform you of this (and provide a link to your queue), but you can ignore it and continue using the web app while it processes.
- Eventually, when the report has finished running, a push notification will inform you that it is ready to download. You can download it directly from this notification or navigate to Reports > My Reports
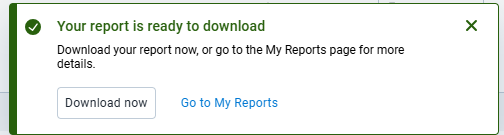
- You can use the link in the push notification to download it right away, or from the My Reports page, select the download icon from the report request

Did you find it helpful? Yes No
Can you please tell us how we can improve this article?
Not what you were looking for? Try a search!